

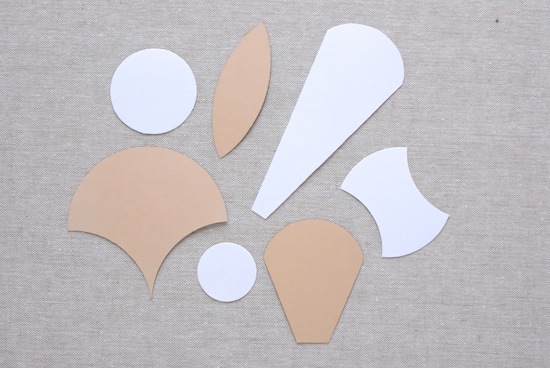
Some of the popular curved EPP shapes include; clamshells, apple cores, Dresden's, circles and hearts - all of which feature one of more curved edges.
Today we're going to be looking at clamshells, which are a great shape to get started with if you haven't tried curves before - because they feature both inner and outer curves.

Ok let's begin. So for this tutorial I'm using the Paper Pieces 3" clamshell shape. Start by cutting multiple squares that are roughly 1/4" bigger than your paper pieces template. Stack 4 layers together and cut around the shape leaving enough room for turning over.

I'm going to show you the two main methods for basting curves, glueing and hand sewing. This is where the nifty little Sewline glue pen is a real timesaver!

Place a dot of glue on the paper template and press onto the fabric to secure.
Swipe your glue pen from one side of the outer curve.
Swipe your glue pen from one side of the outer curve.


Glue across the other half of the curve and pull down the remaining fabric. You will notice pleats to the back of the shape, this is fine - you need these to ease around the curved edge.

Volia! A nice smooth curve, aaaaand you only need to baste the outer curve, how easy was that?!

OK. So if you don't have a glue pen and fancy trying it the traditional method - this is how;

Grab a couple of paper clips to hold your template to the fabric in place. Take a length of thread, knot the end.

Take a running stitch from one side of the outer curve - close the the edge of the fabric.

Gently tug on the thread to pull the fabric over the template shape.

Carry on sewing until you reach the other side and pull taut. Take a 3 or 4 stay stitches to secure. This method I find is a little fiddlier, but also gives good results. You may want to press the edge to help keep the seam flat.

So once you have made enough clamshell shapes for your desired design (mine is going to be x5 wide). Take two, and place right sides together. Find the point at the side of the paper template - make sure they are both lined up precisely as this will make your sewing a lot easier down the line! Thread your needle, knot the end and take 3 very small stay stitches to join your shapes together, tie off.

TIP: Join your points together in sets of two, it will be easier than a whole line of them, and will avoid over-handling them.

Now we've done our first row of clamshells we want to add them to a background fabric. Cut a piece at least 1/2" wider on each side than your finished row and at least 1" wider on the top and bottom.

Press the backing fabric in half lengthwise, this will be our measuring guide to line up the top of the clamshells. But first we have to remove the paper templates!

To remove the paper templates, just give it a little tug and slide out. You can see above the traditional hand sewing method clamshells keep their shape perfectly, whereas the glue pen method are a little stretched - just give them those a little press with the iron.

Take some quilting appliqué glue with a fine nozzle and dab some very small dots around the edge.

Lay the clamshells to line up with the pressed line.

Now you need to appliqué the shapes to the backing fabric. Following along the top scalloped line, run small appliqué stitches - we'll cover this in more detail on our 'EPP finishing week' ;-)

Once you've appliquer the whole row we can add the next row...

With the next row I'm making a set of 4 clamshells because my first row was 5. (The next row will be 5 and then 4 and so on).

Place some dots of glue on the back edge as we did before.

Line up the row so they just cover the tacking stitches we did to join the shapes together. Make sure they are nice and straight to carry on neat rows all the way down.

Applique this row and continue again until you have the finished size you need!
See, not too difficult at all is it? I hope this helped you. See you next week for more English Paper Piecing fun!
Hey thats awesome! I have always wondered if you had a foundation fabric under the whole thing or just the first row. Cant wait to see how to finish this. I may never actually make it but i love knowing how! Thanks!
ReplyDeleteThanks Pam! I'm hoping to finish this one too! I've got a lot of EPP projects on the go right now! ;-)
DeleteThanks for this great tutorial! Very detailed.
ReplyDeleteLove these clamshells!! I have the apple cores on my list, but these are so pretty, too! Thanks for sharing!! xo Heather
ReplyDeleteExcellent tutorial as always!
ReplyDeleteThis is really helpful. The first EPP I ever did was a dresden with a curved edge and I really struggled with getting the edges even and rounded. x
ReplyDeleteGreat to hear this has been helpful for you Kay! Yes the Dresdens work in just the same manner, start with the curved edge first then move on to the straight edges :-)
DeleteI love this! Thank you so much! You're like the quilting grandma I never had. :) I have always wanted to learn. I savo your posts!!
ReplyDeleteWhat a lovely comment :-)
Deleteahh thank you so much Shelley!! So lovely to hear. Yes I'll have to pop a link on my sidebar to all the posts in the series so people can refer back to them easily ;-) xo
DeleteYet another great tutorial. Clam shells still need work but you definitely help show it's not difficult per say, it's just straightforward attention to detail. I recently bought a sew line pen and haven't really used it, but when my City & Guilds course starts on the 24th that'll change! ;-) Thanks
ReplyDeleteThanks Diane, yes it's not the finished article yet! To finish just carry on the rows down until you have enough for your design and trim the sides of the piece measuring out 1/4" from your shortest row (in my case the row of 4 clamshells). Best of luck with the sewing course!
DeleteThis is a super clear tutorial! I can understand your directions for both methods. Thank you for taking the time to explain this technique!
ReplyDeleteThis is a super clear tutorial! I can understand your directions for both methods. Thank you for taking the time to explain this technique!
ReplyDeleteThank you for this great tutorial. I absolutely love clamshell vintage quilts and would love to make one. My question is on that background fabric piece? If I make a whole quilt do I stil just make that background strip to fit the first row? Thanks
ReplyDeleteAnd I forgot to ask about the acrylic templates for cutting? Are they needed or just easier? Thanks
ReplyDelete