Tuesday, 27 August 2013

Double Irish Chain Quilt

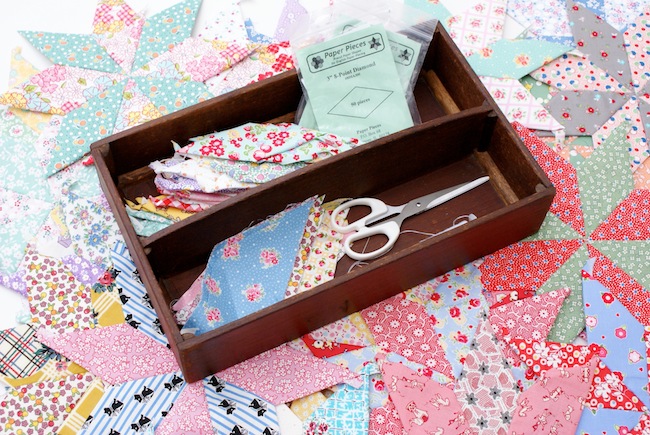
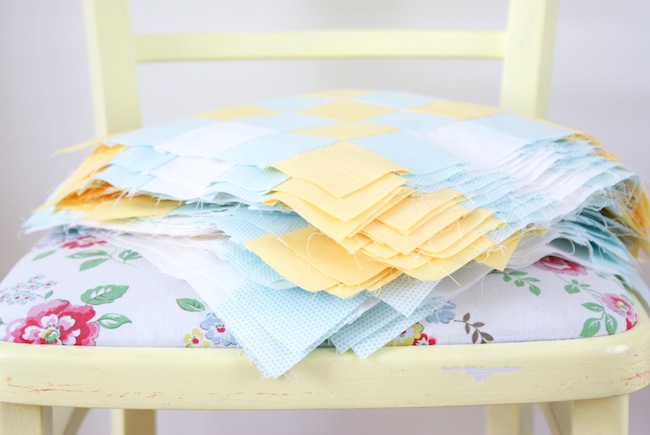
Yes, I've started another quilt - OK it's a sickness. I really can't help myself since I have beautiful fabrics pouring into Sew and Quilt quite regularly it's very hard not to dream up quilt ideas for them all. These blocks below will be turned into a double irish chain quilt for our bed, I've had the Scrappy Trips on their for a while and although I love it - I've been wanting something a little softer. So for this project I've chosen Happy Go Lucky Aqua Penny Dots, along with some Kona Lemon and Kona Snow. I'm hoping it will all work together nicely as it's a big quilt! It's going to finish at 88" square, yikes!
I got the pattern from a book my mum picked up for me at the carboot earlier in the summer. It's called Quilts Around The Year and it's got lots of traditional projects which are themed by the season. I really love most of the projects actually and I am particularly taken by the Rose Wreath quilt from the front cover, I've never thought of trying appliqué before but this has really got me itching to try it sometime. I don't think I could manage a whole quilt top but a small wall hanging could be achievable!? I've also been inspired by the many quilts featured in a beautiful turkey red and green colour-way, I will definitely be using that in some up-coming Christmas projects this year.

You can find the link to the book on my 'Books I Recommend' tab on my sidebar, it's only $5.99 in the U.S. and good news for my UK readers, I've found it for only 1p !! that's cheaper than carboot prices ;)
So all 64 blocks are complete! and now for the fun part, sewing it into a quilt top - I love this part, it's when it all starts to take shape and you can really see what it's going to turn out like :) I'll hopefully be able to post a finished quilt top soon! Hope you're all having a great week. 

p.s. On a side note, thank you to some of my blog pals who let me know recently I was a 'no reply blogger', my settings were changed when I moved to Google+ and I hadn't realised! grhh! It's now updated  at last! and sorry if I haven't replied to some of my lovely blog comments recently, I've been so behind. Just wanted you all to know I'm very appreciative taking the time to write a little message on my posts :) xo

Thursday, 22 August 2013

Sampler Quilt Progress

I thought I would check in today and give you an update on my sampler quilt, you may have read my previous post where I was in a bit of a quandary as to whether I would hand or machine quilt it? Well, the the results came back from you all that I should hand quilt it, and that I did!  
I'm enjoying the process so far and I really like the effect, definitely made the best choice! I'm using an Aurifil embroidery floss in a neutral colour that I got free in my Fat Quarterly retreat goodie bag :)

Just recently I received stock of some great quilting stencils, they are plastic templates with designs cut into them that you can just draw around and then stitch over the top! You can use them for hand or machine quilting, so for this project I've picked out a couple of traditional floral designs and been stitching these into some random blocks along with some straight line stitching to mix things up. You can purchase these in my shop here! I would also thoroughly recommend the use of a quilting hoop, this really has been a life saver and helped me to keep my stitches even. The stitching above was my first block :| it's amazing how quickly you can improve after a little practice!
I'm really excited to get this finished and up on the wall, it's going to be perfect for Autumn :) Hope you're all having an enjoyable week. xo

Thursday, 15 August 2013

Have it All Wallet

My IG pals will know I was busy last week making a new purse for myself. I've been eyeing up the 'Have It All' wallet by Straight Stitch Society for some time, as I was in desperate need of a new wallet. I pinned it aaaages ago but on a whim, I purchased on Thursday evening and got straight to work on Friday. I was quite nervous about doing it as I'm not so good with little fiddly projects, but I'm really surprised with the outcome! I think it's a bit of a testament of how far my sewing skills have improved over the years :) It also helps when you have clear instructions and diagrams from a good pattern ;)
Though, don't think I whipped up the first one in a couple of hours! no, no, lots of reading, and re-reading but only a little stitch ripping to get my edge-stitching around the wallet just right. All the effort paid off though, I'm completely in love with it and I'm so pleased to replace my old battered wallet that I was always mortified to get out in public (yes, it really was that bad - a sales assistant once told me 'I needed to clean up my purse' - yikes!) So, you ask why do I have two? Well, my mum took one look at mine and said "can I have one!". So of course I had to oblige :) so she has the pink one, and I have the white one.
It's got so many compartments! I love having loads of space in my wallet to keep things organised. I used Lecien Old New 30's prints and popper snaps for the closure - they're so fun to use! I'm really excited about making a bag next! I've been thinking about the aeroplane bag for travelling or this really cute tote bag by Noodle-Head but I just can't make up my mind about a fabric choice which is never a problem for me normally? It's funny how one project get's your creativity going in a new direction :) 
Thanks for stopping by, xo

Friday, 9 August 2013

Diamond Paper Piecing Progress

I attended my brother's wedding over the weekend on the south coast, there was lots of travelling involved so I got myself organised before we left and cut up a bunch of diamond shapes for my current paper piece project. I really don't know how I coped with long journeys before epp? It certainly made the five and half hour trip go a lot quicker! I managed to get quite a few more diamonds basted and sewn together so it was a productive weekend! 
When I'm travelling I like to keep my paper piece shapes, scissors, needle and thread in this drawstring bag and when I'm home I keep it in one of my sewing boxes which has a pull out tray perfect for keeping things organised :) and it's really good because I can transport it around the house, depending on where I sew. How do you organise your epp? Do you cut up all your shapes and baste everything first? For me, I like to rotary cut lots of shapes out at a time, then do a bit of basting and sew the diamonds together when the mood takes me and so I can see how it's coming together, and add in certain colour's if I feel they are missing. You can purchase the paper pieces and most of the fabrics I've used to make them at my shop, Sew and Quilt.
It's so exciting seeing them all laid out! So... I was thinking - if you're not already on a epp project of your own, would you like to join me in making a 8-point diamond star quilt?! I would love it if people wanted to make their own version. My stars are made using the 3" diamond paper pieces, I think I'm going to make it 5 stars wide by 8 down, so it will be a comfortable lap quilt. I may go bigger to 6 star's wide! See how I go ;) I thought Kona Pearl Pink would be a good backdrop for them, what do you think? Drop me a message if you want to make one too :) Jessie, xo

Wednesday, 7 August 2013

Kitchen Pot Holder Tutorial

Hi everyone! After sharing my finished oven mitt and matching pot holder I made using Bake Sale fabric and some trusty Pam Kitty Love the other day I received a message from one of my blog readers saying she wanted to re-create a pot holder for herself, so I'm here today to give you a tutorial so you can all make one! :) It uses the Ohio Star block pattern for the top and measures 8" square, a perfect size to hold a range of saucepan's or just look pretty in your kitchen! (which is what mine will be used for as I didn't have any Insul-bright for the inside!).
1. Cut the following;
(1) 3 1/4" square - centre piece
(4) 3 1/4" square - background
(2) 4" square - background
(2) 4" square - coordinating fabric for star

(1) 40" x 2" - binding
(1) 8" x 2" - loop
(1) 8.5" square - backing fabric
(1) 8.5" Insul-bright square

2. Cut each of your 4" squares in half, corner to corner. Repeat on the other diagonal so you have 16 quarter square triangle units.
3. Begin sewing your unit's together (along the shorter side of the triangle). Alternate the fabric print (e.g. sew 8 pink cherries on the left, then sew the 8 units with the pink cherries to the right).
4. Now sew your triangle units together, notice now the fabric print's are opposite each other ;)
5. Once you have your 4 quarter square triangle units sewn together, lay your block out as shown below (well, not quite - please note the incorrect unit placement on the bottom! This should be turned to the side, as the top one is).
6. Sew your units to make 3 rows. Then sew your rows together to create your Ohio Star block.
7. Lay your backing fabric face down, then Insul-bright wadding with the pot holder top, face up - and pin in place using quilter's curved safety pins.
 8. Quilt your pot holder top as desired. I machine quilted mine with a walking foot. Square up your block and trim excess. 
 9. For the hanging loop, just make this as you would for regular binding, then fold it again in  half lengthways and sew down the edge. Pin to the corner of the backing fabric.
10. Pin your binding in place and sew. (If you're unsure about binding there's plenty of help on the web, or try Jeni B's tutorial here).
11. Fold over and pin the binding in place to the back of the pot holder (your hanging loop should now be visible). I like to hand sew all of my binding's as it doesn't take very long and, personally I like the look of it much better to machine sewing. 
I hope you liked the tutorial! If you have any questions, please drop me a message. I'd love to see your finished pot holders, feel free to post them on my Sew and Quilt facebook page or add them to the Flickr group (all fabrics available at Sew and Quilt) Jessie, xo

Thursday, 1 August 2013

Quilt Design Board DIY

Putting up a quilt design wall has been on my list of things to do ever since I had my overhaul in the sewing room a few months back, somehow I never got round to getting it done? I've also been getting tired of tip-toeing around quilt blocks I had arranged carefully on the floor! So enough was enough!!
Last Saturday I got my butt in gear (with the help of Robin) we made a quick trip to B&Q and picked up two sheets of hardboard, some gaffa tape and a roll of 'No More Nails' double sided tape. I already have a roll of 100% cotton batting that I use for my quilt-making so I just cut it to size plus a couple of inches bigger, ironed it and then laid it flat on the floor with the hardboard on top and gaffa taped it in place all the way around the edges. We then used a few rows of double sided tape on the back of each board and stuck them to the wall side by side! voila, done! 
It's not the best budget busting DIY, roughly £20 + the cost of the wadding but it worth it's weight in gold getting things off the floor! The hardboard works really well to make it a nice hard flat surface that you can stick your quilt blocks to and re-arrange for colour placement etc. I've seen some people hang batting up with a curtain pole, so there's lots of other ways to do it - but I wanted a firm surface. I'm amazed at how well things stick to it! It's such a great way of brightening up my sewing room, while being practical :) I love just gazing at my WIP now. Above are the farmers wife blocks I've completed so far - not many!! and some *very wonky* stars I did ages ago. I think the design board will be a good way to motivate me to complete some projects! :) 
Jessie, xo